To add a Scene Control panel to a scene or base scene:
- Navigate to Toolbox > Resources > Control Panel
- Single click Control panel resource
A single control panel resource can be added to each individual scene or base scene.
Only one control panel is permitted per scene.
To access the Scene Control panel:
- Navigate to View > Control Panel
You can also add a new Control Panel by clicking Add Control Panel in the CP Panel itself
The Scene Control panel is used to design a custom user interface and bind the controls to Scene Objects.
The simplest way to create these bindings is to drag and drop an existing element directly onto the Control Panel:
- Actions from the Timeline
- Scene Objects from the Scene Tree
The system will automatically create and bind a corresponding control.
Control Panel Toolbar Options
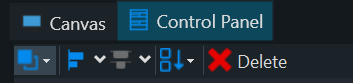
Order - Select one or more CP Control Objects first and then select an order operation to bring that object either forwards or backwards in layer order.
- Bring to Front
- Send to Back
- Bring Forward
- Send Backward
Align - Select at least two CP Control Objects and then select an Alignment operation to align those objects.
- Align Left Edges
- Align Horizontal Centers
- Align Right Edges
- Align Top Edges
- Align Vertical Centers
- Align Bottom Edges
Distribute - Select at least three CP Control Objects and then select a distribution operation to distribute those objects.
- Distribute Left Edges
- Distribute Horizontal Centers
- Distribute Right Edges
- Distribute Top Edges
- Distribute Vertical Centers
- Distribute Bottom Edges
Control Placement - When new Controls are added to a Control Panel, this determines their initial location relative to existing Controls.
- None - layered directly on top of each other
- Left to Right - adds CP controls from left to right
- Top to Bottom - adds CP controls from top to bottom
(Changing this option also changes the Config Control Panel Placement Setting)
Control Panel Binding Properties
Control panel Controls have their own set of bindings
- Mode - Project, Object, and Keyframe
- Object - objects within the Scene Tree
- Property - selected object properties
Clicking Add will create a blank placeholder Binding which allows users to manual type the Mode, Object, and Property desired.
You can also click the dropdown next to add and select the Mode, Object, and Property.
Selecting a target binding and clicking edit will bring up a populated dropdown UI with the Mode, Object, and Property.
Selecting Project Mode allows users to select the primary project scene group and the scene group properties.
Selecting the Keyframe Mode allows users to select an Object, Action, a specific Keyframe, and the Property that has a Keyframe.
Control Panels have their own set of Properties:
Auto Tab Index: sets the tabbing order for items on the control panel based on their position. The tab order is set automatically from left to right and top to bottom. To set a custom Tab Index uncheck this option and set the Tab Index using the advanced properties.
Selecting the lightning bolt will show all the events for the control:
Buttons allow users to bind different types of commands within the “Properties panel” of the control. In this example, the button is bound to a Condition.
You can continue to bind as many commands to the button as needed.
Behavior
Visible On - Designers can choose per control to appear on Preview, Program, or both in PRIME’s Playout Channels.
- Preview
- Program
- Preview and Program (Default)
Enabled - indicates whether the control is enabled
Tab Stop - indicates whether the user can use the TAB key to give focus to the control
Tab Index - determines the index in the TAB order that this control will occupy